
How I got a Raspberry Pi 4 to boot from an SSD that wouldn't
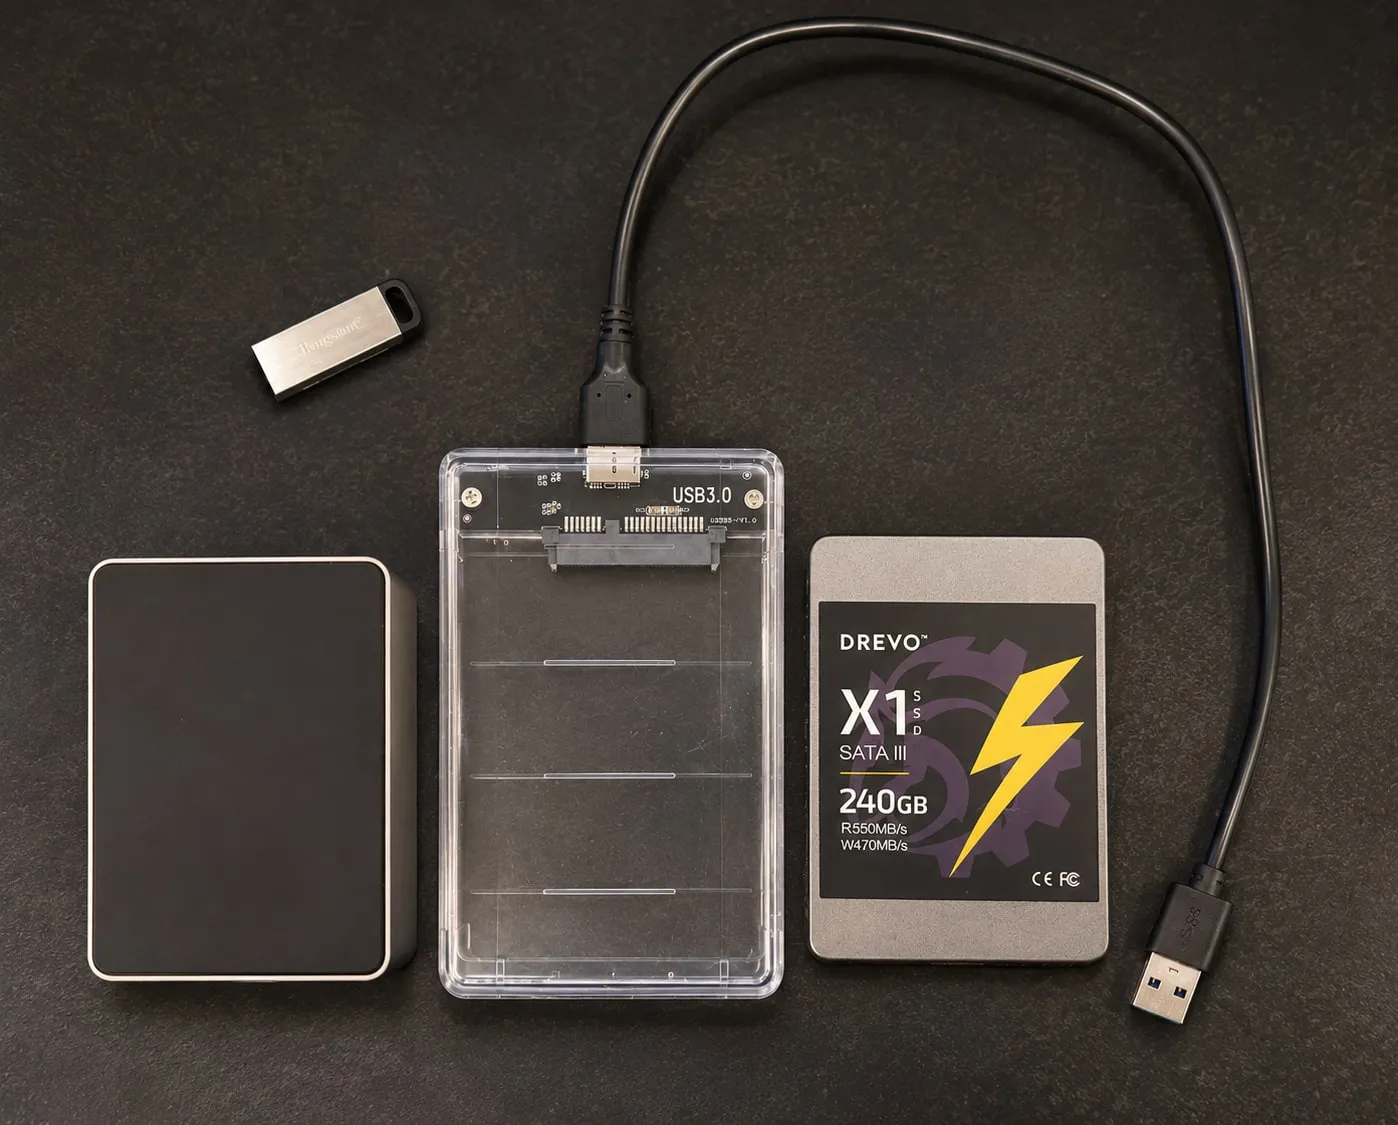
My Raspberry Pi 4 refused to boot from an old SATA SSD in a cheap USB enclosure. Two fixes got it working: updating the Pi’s bootloader and turning off UAS for the enclosure’s JMicron chip. If your Pi won’t boot from a USB SSD, here’s what to try.
What happened
My Pi-hole has been running for years off a USB stick on an old version of Raspberry Pi OS, which no longer gets updates. A USB stick is a poor home for something that handles DNS for the whole house, as cheap flash tends to fail without warning.
I found a little-used 240 GB SSD from an old laptop, and an old USB 3.0 enclosure I had lying around, and decided to build a new Pi-hole running the latest version of Raspberry Pi OS. My plan was to prepare it on a spare Pi 4, so the live Pi-hole stayed untouched. It was then that a quick project turned into a couple of hours when it wouldn’t boot.
The Pi simply ignored the SSD: it behaved exactly as it did with no drive plugged in at all. The power supply, the USB port, the Pi and the image on the SSD were all fine. The problem was the Pi’s bootloader, which was from January 2021 and couldn’t cope with the enclosure’s chip over USB 3. Booting from a USB 2 port instead worked, so I could SSH in, and from there I could install the latest bootloader. After that, the SSD booted from USB 3 too.
Step 1: make sure the Pi is really on
While you’re troubleshooting, connect the Pi with an Ethernet cable, even if you’ll use Wi-Fi later: the lights on its Ethernet port tell you what it’s doing.
- No Ethernet lights: the Pi isn’t running at all. They come on within seconds of the Pi starting, before any operating system loads.
- Green and amber lights on but steady, never blinking: the Pi is running, but it hasn’t found anything to boot.
- Blinking lights: there’s network traffic, which usually means it has booted. To be sure, check that it shows up in your router’s list of devices.
If you shut the Pi down to swap drives, it won’t start up again by itself, even though it’s still plugged in. A Pi 4 has no power button, so unplug it and plug it back in to start it. (A flashing light on the enclosure only means the enclosure has power, not that the Pi is running.)
If the lights stay steady and the Pi never appears on your network, try a quick test: start it with no drive attached. If it behaves exactly the same as with your SSD, the Pi can’t see the SSD, and the next step is for you.
Also worth ruling out: unplug any SD card and other USB drives, and use a proper power supply (the official 5.1 V, 3 A one).
Step 2: boot from a USB 2 port, then update the bootloader
The Pi 4 keeps its bootloader on a chip on the board, not on the SD card or SSD. It stays with the Pi, and it doesn’t update unless you ask it to. Newer bootloaders work with far more USB drives and enclosures, and an old one can be fussy over USB 3.
Move the SSD to one of the black USB 2 ports and start the Pi again. This is what got mine going: the old bootloader couldn’t boot from the SSD over USB 3, but it could over USB 2. It’s slower, but it gets you into your new system, which is what you need to install the latest bootloader.
Once it’s up, SSH in (or plug in a keyboard and screen), update everything, then check the bootloader:
sudo apt update && sudo apt full-upgrade
sudo rpi-eeprom-update
Mine was from January 2021:
BOOTLOADER: update available
   CURRENT: Sat 16 Jan 14:10:13 UTC 2021 (1610806213)
Install the update and reboot. Don’t cut the power during this reboot: that’s when the Pi writes the new bootloader to its chip, and an interrupted write can leave it unable to start.
sudo rpi-eeprom-update -a
sudo reboot
Then move the SSD back to a blue USB 3 port. With the new bootloader, mine booted from USB 3 too.
Two things worth knowing:
- Use the latest version of Raspberry Pi OS for the update. An older version can’t see the newest bootloaders: Raspberry Pi OS bullseye says it’s “up to date” with a January 2023 bootloader, because its package is frozen. That’s another reason to update from the new system on the SSD.
- If your SSD won’t boot from USB 2 either, use Raspberry Pi Imager to write Raspberry Pi OS Lite to a USB stick for now, and see if the Pi will boot from that. If it does, update the bootloader from there with the same commands, then go back to your SSD. If nothing on the Pi boots, Raspberry Pi Imager can write a bootloader update to an SD card (in its OS list, under Misc utility images). Boot from it once, then remove it.
Step 3: turn off UAS for the enclosure’s chip
For this step, the Pi needs to be running from your SSD. With the new bootloader, try booting it from a blue USB 3 port first; if it still won’t, use a black USB 2 port. (If you updated the bootloader from a USB stick, unplug the stick first.)
UAS (USB Attached SCSI) is the newer, faster way for a computer to talk to a USB drive. The older way handles one request at a time; UAS lets the computer send several at once, which makes the most of USB 3 and of SSDs. But it relies on the chip inside the enclosure doing its part properly, and not all of them do.
Many cheap USB-to-SATA enclosures use JMicron chips, which handle UAS badly on Linux. The result is freezes, slow transfers or the drive dropping out, so it’s worth fixing even once the Pi boots.
The enclosure won’t tell you what’s inside, but Raspberry Pi Imager gives a clue: mine listed the drive as “JMicron Tech Media”.
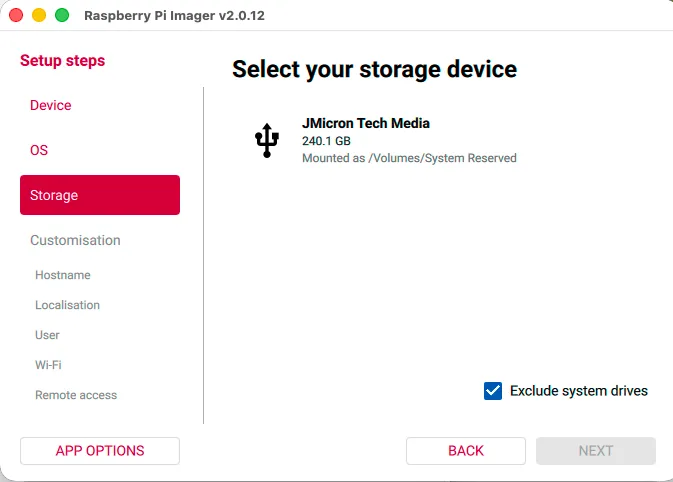
On the Pi, find the chip’s ID:
lsusbMine showed 152d:0578 JMicron Technology Corp. JMS578 SATA 6Gb/s. The two numbers are the chip’s ID: the maker (152d is JMicron), then the model.
The fix is a “quirk”. Linux keeps a list of devices that don’t quite behave as they should, called quirks, and tells its drivers how to work around each one. You can add your own to that list when the Pi starts up. You give the chip’s ID followed by a letter that says what to do, and u means “don’t use UAS with this device”. Linux then uses the older, simpler USB storage driver for it instead. In theory that’s a little slower, but it’s far more reliable with these chips.
The Pi reads its start-up settings for Linux from a file called cmdline.txt. Add the quirk to the start of it (the file must stay a single line), then reboot. For the JMS578:
sudo sed -i '1 s/^/usb-storage.quirks=152d:0578:u /' /boot/firmware/cmdline.txt
sudo reboot
For another chip, swap 152d:0578 for its ID. Then check it worked:
lsusb -t | grep -i storageYou want Driver=usb-storage rather than Driver=uas, and 5000M if it’s in a USB 3 port (480M means USB 2).
This setting lives on the SSD, so it goes with the drive to any Pi you plug it into. The bootloader, on the other hand, stays with the Pi.
Step 4: try USB 3 again
If your SSD was still in a USB 2 port, shut the Pi down, move the SSD to a blue USB 3 port, and power it back up. With the new bootloader and the quirk, it will hopefully boot now.
Still stuck?
If it still only boots from USB 2, you could decide to stick with that. USB 2 is slower, but for most small home servers, such as Pi-hole, it’s plenty fast enough.
Otherwise, at this point it’s best to try a different enclosure. Ones with an ASMedia ASM1153E chip have a good record on the Pi.
Further reading
- Fixing Storage Adapters for Raspberry Pi via Firmware Updates, James A. Chambers: UAS quirks, and a firmware update for the JMS578
- External JMicron JMS578 requires usb-storage quirks, EndeavourOS forum: the same chip misbehaving on desktop Linux
- Slow USB access on Pi 4 after Umbrel v1.7.3, Umbrel community: Umbrel uses the same
152d:0578:uquirk
Comments
Other websites can respond by sending a Webmention.
Powered by Atmosphere Comments for Astro